Creating maps from GRIB2 Data in Scala (and Java)
Featuring GeoTools, Natural Earth Data, SBT Headaches and more.
In my last post I explained how to go about reading data from GRIB2 files using the netCDF library. Now we are going to go about creating a map of predicted temperature, complete with country borders.
This is going to be a high level overview of how I achieved this, the full source is available on github here.
Colour Interpolation
Ok lets start with a bit of code unrelated to grib2, weather or really maps, colour interpolation. We want to be able to define a colour scale and then smoothly interpolate so that we can get a colour for each data point. This isn’t too hard but if we want some nice, reusable code, we get something like this:
case class ColourScale (colours: (Double, Double, Double)*) {

  def mapValue(minVal:Double = 1, maxVal:Double = 1)(value: Double,interpolate: Boolean = true): (Int, Int, Int) = {

    val fi = ((value - minVal) / (maxVal - minVal)) * (colours.length - 1)
    val index = fi.toInt
    val step = fi - index

    if (!interpolate || step < 0.0001) {
      val (r,g,b) = colours(index)
      return (r.toInt, g.toInt, b.toInt)
    }

    val (r1, g1, b1) = colours(index)
    val (r2, g2, b2) = colours(index + 1)

    (
      (r1 + step * (r2 - r1)).toInt,
      (g1 + step * (g2 - g1)).toInt,
      (b1 + step * (b2 - b1)).toInt
    )

  }

  def reverse: ColourScale = ColourScale(colours.reverse: _*)

}
This class allows us to define a colour scale as a list of RGB tuples, in order from lowest to highest. The main function, mapValue is curried, so that we only need to pass our min and max values once to create an anonymous function and then we can use that many times. This code is adapted from a stack overflow answer (which I can’t find now) but the way it works is to figure out the nearest colour in our scale, and how far we need to be from that colour. It then uses linear interpolation to create (acceptably) smooth transitions between colours. This isn’t the best way of doing this, but its certainly good enough for now.
An example colour scale might be as follows:
val CS_STANDARD = ColourScale(
    (0xad, 0x05, 0x05),
    (0xFF, 0x00, 0x00),
    (0xf7, 0x85, 0x38),
    (0xed, 0xf7, 0x37),
    (0x42, 0xe2, 0xf4),
    (0x00, 0x00, 0xFF)
  )
In my code I have defined a number of these on the companion object.
Making a Map
The next step is to actually plot every point in the grib file to an image. For this we are going to convert our grib2 dataset into an array and use that. In this code you can see a number of helper classes that I have created to make this process cleaner. The main one is the GhridSpec. This gives us information about how the gridded data relates to real-world coordinates. This function is also designed to create images of any size, by scaling in either the X (longitude) or Y (latitude) direction.
def generateImage(data: UcarVariableGridWrapper, resolutionX: Option[Int] = None, resolutionY: Option[Int] = None, interpolate: Boolean = true, scaleRange: Option[(Double, Double)] = None): BufferedImage = {

    import data.gridFilter.gridSpec._

    val (width, height) =
      if (resolutionX.isDefined) {
        val w = resolutionX.get
        val h = (w.toDouble / longSize) * latSize
        (w.toInt,h.toInt)
      }
      else if (resolutionY.isDefined) {
        val h = resolutionY.get
        val w = (h.toDouble / latSize) * longSize
        (w.toInt,h.toInt)
      }
      else (longSize, latSize)

    val (minValue, maxValue): (Double, Double) = scaleRange.getOrElse((data.javaArray.map(_.min).min,data.javaArray.map(_.max).max))

    val xScale = width.toDouble / longSize
    val yScale = height.toDouble / latSize

    val colourMapper = (colourScale.mapValue _)(minValue, maxValue)

    println(s"xScale = $xScale")
    println(s"yScale = $yScale")

    val image = new BufferedImage(width, height, BufferedImage.TYPE_INT_RGB)

    for (x <- Range(0, width)) {
      for (y <- Range(0, height)) {

        val I_X = (x / xScale).floor.toInt
        val I_Y = (y / yScale).floor.toInt

        val d = colourMapper(
          data.getIndex(I_Y,I_X),
          interpolate
        )

        val (r,g,b) = d
        var p = (0 << 24) | (r << 16) | (g << 8) | b
        image.setRGB(x,y,p)

      }
    }

    return image
}
This code starts out by calculating how much it needs to scale each direction by inorder to match the desired size. Next it finds the maximum and minimum values of the data to use for the scale, unless we have defined an absolute scale. Next it iterates over every pixel in the image. I_X and I_Y represent the index in the grib2 data nearest to the pixel. This is a very dumb method with no interpolation in “blown up” images but is good enough. We then use our colour mapper function, defined from our colour scale to get the correct RGB values for the pixel. Finally we use some bit-shift magic to get the correct final value and set that in the image.
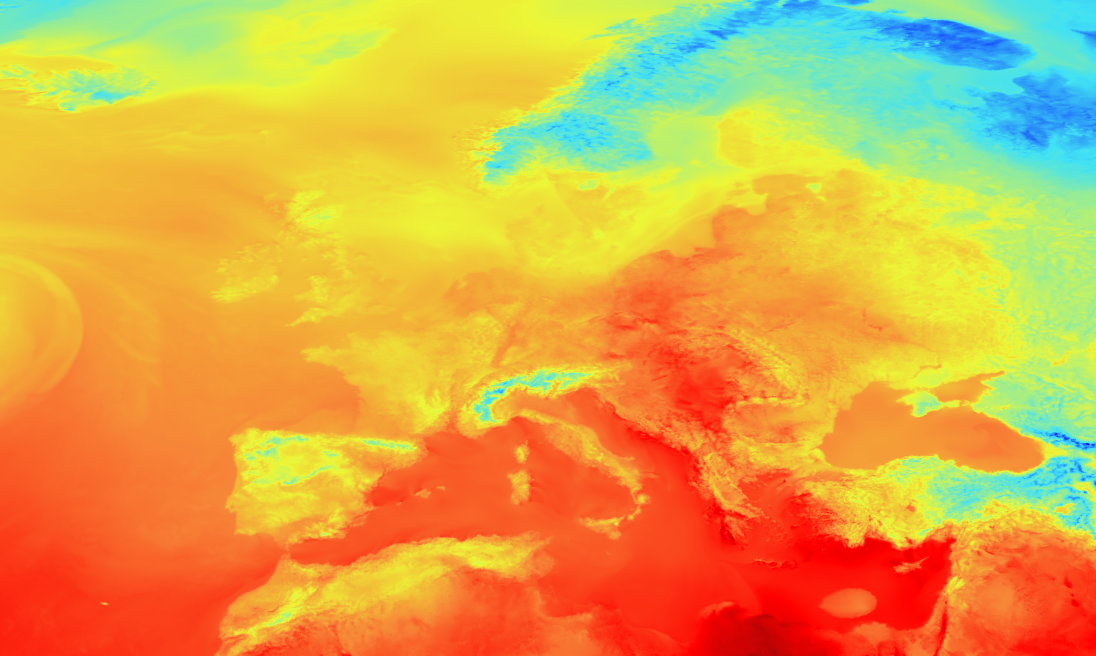
This function run on a temperature scale will look something like this. You can just about see the outline of major landmasses but nothing more.
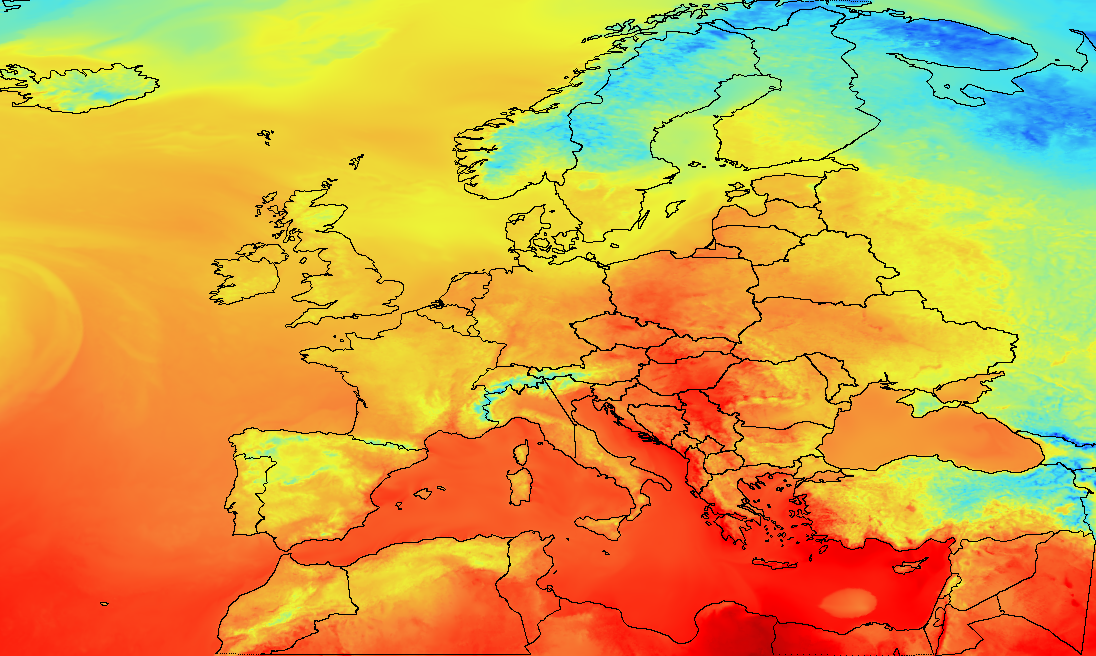
Adding Borders
The final step is to add the outlines of landmasses and countries. To do this I first downloaded a map from the fantastic Natural Earth Data. We are interested in the shapefile data (the .shp and .shx files). To read this we will use GeoTools, a java library with a huge number of features but we will use gt-shapefile. Currently an issue with SBT makes it quite hard to download this library. The work around is to turn of “gigahorse”, which seems to solve the issue. Our build.sbt now looks like this:
updateOptions := updateOptions.value.withGigahorse(false)

resolvers += "Boundless" at "http://repo.boundlessgeo.com/main"

resolvers += "OSGEO" at "http://download.osgeo.org/webdav/geotools/"

// https://mvnrepository.com/artifact/org.geotools/gt-shapefile
libraryDependencies += "org.geotools" % "gt-shapefile" % "19.0"

// https://mvnrepository.com/artifact/org.apache.commons/commons-compress
libraryDependencies += "org.apache.commons" % "commons-compress" % "1.16.1"

// https://mvnrepository.com/artifact/commons-io/commons-io
libraryDependencies += "commons-io" % "commons-io" % "2.6"
Now we can open the map file, read it as a list of polygons, and extract their points. The code for doing this is as follows. The convertToIDXOption method simply converts the point from (lat,long) to an index in the grib array. If the point is outside of the boundaries of the array None is returned and the point is ignored. In future I want to have it be able to deal with this more gracefully but for now this is it.
class MapData(val data: List[List[(Double, Double)]]) {

  def interpret(filter: GridFilter): List[List[(Int, Int)]] = {

    data.map(
      _.map(
        P => filter.convertToIDXOption(P._1, P._2)
      ).filter(_.isDefined).map(_.get)
    )

  }

}

object MapData {

  def readFromShapefile(file: File): MapData = {

    import scala.collection.JavaConverters._

    val map: Map[String, String] = Map ("url" -> file.toURI.toString)
    val dataStore = DataStoreFinder.getDataStore(map.asJava)

    val typeName = dataStore.getTypeNames.head
    println(s"Reading $typeName")

    val iterator = dataStore.getFeatureSource(typeName).getFeatures().features()

    val polygons = ArrayBuffer[List[(Double,Double)]]()
    while (iterator.hasNext) {

      val feature = iterator.next()
      val geom = feature.getDefaultGeometryProperty
      val poly = geom.getValue.asInstanceOf[MultiPolygon]

      for (i <- Range(0, poly.getNumGeometries)) {
        val geom = poly.getGeometryN(i)
        val coords = geom.getCoordinates.map(T => (T.y, T.x)).toList
        polygons.append(coords)
      }

    }

    iterator.close()

    new MapData(polygons.toList)
  }

}
To add these points to the map we are going to ammend our generate image method so that it takes in each polygon and draws lines between all the points. There are many ways of doing this, my implementation is below:
for (poly <- mapData.get.interpret(gridFilter)) {

  var lastPoint: (Int, Int) = null

  for (i <- poly) {

    val point = gridFilter.filterIDX(i)

    if (lastPoint != null) {

      val (startX, startY) = (lastPoint._1.toDouble, lastPoint._2.toDouble)
      val (endX, endY) = (point._1.toDouble, point._2.toDouble)

      val STEP = if (startX > endX) -0.05 else 0.05
      var xSTEP = STEP
      val GRAD =
        if (Math.abs(endX - startX)< 0.001) {
          xSTEP = 0
          if (endY > startY) 0.4 else -0.4
        } else (endY - startY) / (endX - startX)

      var posX = startX
      var posY = startY

      //println(s"From $startX,$startY to $endX,$endY with grad $GRAD and xSTEP $xSTEP")

      while (!(posX.round == endX.round && posY.round == endY.round)) {

        posX += xSTEP
        posY += GRAD * STEP

        image.setRGB((posY * xScale).round.toInt, (posX * yScale).round.toInt, 0)

      }

    }

    image.setRGB((point._2 * xScale).round.toInt, (point._1 * yScale).round.toInt, 0)

    lastPoint = point

  }

}
My line interpretation for loop is over-complicated and inefficient but it works, drawing black lines between the points. The lines are calculated at the scale of the grib data and then scaled like before with xScale and yScale.
The output of this is something like the following: